

sweet bunting
It was my oldest girl's birthday.
So I made this little bunting for the festivities.

Here is what I used:
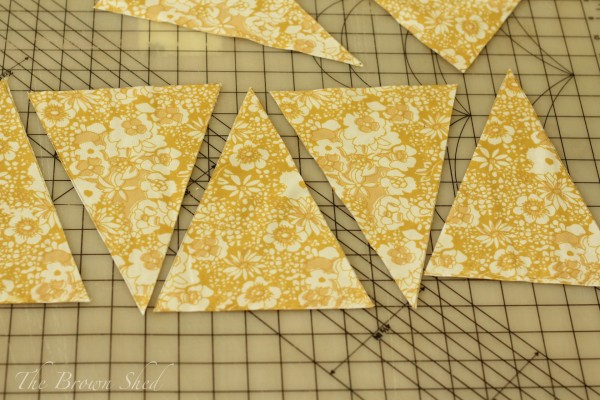
A large cutting mat, a rotary cutter, cutting edge (not sure the real name, but it's made by Omnigrid), a pattern I made from an old manilla folder, pinking shears*, pencil, fabric and bias tape.

I cut out a variety of triangles and laid them out to see how I wanted the fabrics arranged.

Once I decided how long I wanted the bunting to be, and how I wanted the fabrics arranged, I started sewing it up.

I placed two triangles, wrong sides together, then sewed up the long sides using a straight stitch. I then trimmed the edge using my pinking shears*. I now realize the pinking shears are not in the photo of supplies above. I think this decision came later. Not critical, so you could skip this step, but I liked the zig-zag edge.
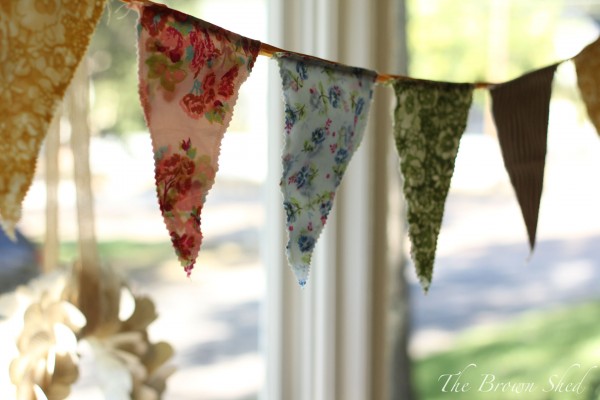
Now I started sewing the triangles to the bias tape. I just eye-balled it. I folded over the top of the triangle to hide the raw edge, and used a straight stitch to attach to the tape. There are so many ways you could do this part. Do what works for you. You can see in the photo below, it's not perfection, but my daughter loved it, and that was my goal.
Weeks later, I made the same bunting using cotton cording rather than the bias tape. Just as cute. You just wrap the top of the triangle over the cord, and sew with a zig-zag stitch. This turned out to be a simpler look, but you don't get the pop of color from the bias tape.
I know buntings have been all the rage... and I hope it stays that way for a while.

Aren't they fun?
Happy weekend!